Japanese Cooking 101, Lesson 2: Prep and Cook A Great Bowl of Japanese Rice

This is Lesson 2 of Japanese Cooking 101. Today I'll show you how to cook the star of Japanese cooking - plain, steamed rice. Rice is so central to the Japanese table that the word for cooked rice, gohan (ご飯)to use the polite term, or meshi (飯)to use the more informal term, is also the word for the entire meal. In other words, in Japan when you have rice, you have a meal.
Another point to keep in mind is that most savory foods eaten in Japan, with the exception of noodle dishes, are designed to go well with plain rice. Once you understand that a lot of things about Japanese cooking will make sense. Japanese dishes tend to be a little bit too salty or a little bit too well high in flavor, especially umami, to eat on their own. They are made that way on purpose so that they will pair well with the blandness of that bowl of plain rice.
Preliminaries: What is Japanese rice supposed to be like?
The handiest way to see how Japanese rice is supposed to be like is to get one of these - a pack of microwaveable rice.
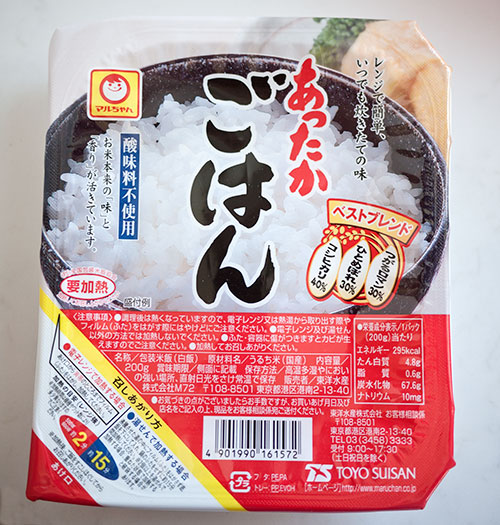
I wish I could say you can go to your nearest Japanese restaurant to get a bowl of good rice, but I've seen such difference in quality at various so-called Japanese restaurants that I'm hesitant to do that. But I do know that these microwave packs are pretty uniformly good.
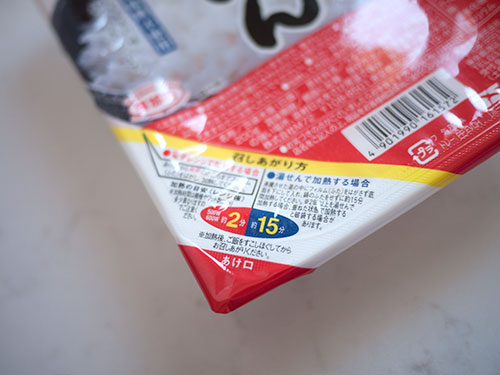
So how do you heat these things? If you look at the corner of the rice packet - and this is something all the different brands of these rice packets share - you see the numbers 2 and 15. That means that to cook it in the microwave you need to peel back the top wrapper to the line, then microwave on the High setting for 2 minutes. If you don't have a microwave you cat heat it up over a pan of boiling water: Put the pack in a pan of boiling water lowered to a simmer, with the top wrapper on, and heat for 15 minutes.
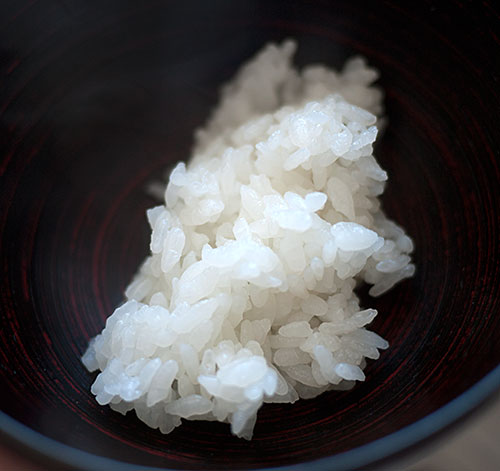
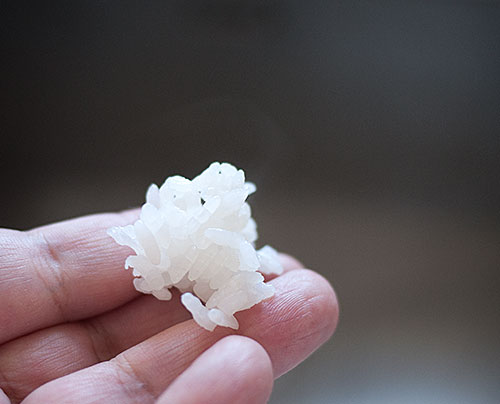
So go ahead and heat up the rice. Take some out - careful, it's very hot - and put a little into a bowl. Taste it without anything on it. The rice should taste quite clean, with a slightly sticky texture so that the grains adhere to each other if you press them together lightly. However, each grain is still intact and not at all mushy.
One more thing:
One of the things that flummoxed me most when I got interested in cooking as an adult (I cooked a bit as a teenager, but mainly things like everyday Japanese food and cookies) was this insistence in many American cookbooks that the ideal texture of rice should be "fluffy". I didn't get it at all, since fluffy to me is duck feathers, the fur on my favorite teddy bear, a soufflé maybe, or angel food cake...in other words, not something applicable to well cooked rice, at last not Japanese style rice. I do understand that some types of rice, such as basmati (my second favorite kind of rice) and jasmine, need to have fairly firm and separate grains. I also understood why risotto needed to be creamy. I have since tried rice that is said to be 'fluffy', such as the type that cooks up in a minute...but if that's supposed to be 'perfect' rice then I don't know what.
But regardless of how other types of rice are supposed to be like, the bottom line is: Japanese rice is never, ever "fluffy".
Now you know how Japanese rice should be like, you should also understand why you cannot substitute the types of long-grain rices that should have separate, non-sticky firm grains like jasmine, not to mention Carolina type rice. (You can use the medium-grain rice types that are used in risotto and the like in a pinch; see Looking at Rice, my rice-type primer.)
So let's cook some Japanese rice!
Rinse, dry, soak: The most important steps to cooking Japanese rice
Many rices don't need any rinsing at all, and with some, such as the risotto rices, it's even prohibited, since the powdery substance is critical to the creamy texture. Things are very different when it comes to Japanese rice: the rinsing, drying and soaking steps are the most critical parts of cooking properly textured, properly tasting rice.
In this lesson we will be cooking 320g / 360cc (360ml), or 1 1/2 U.S. cups ((11.3 oz) of rice. If you have a rice cooker, this is equivalent to 2 rice cooker measuring cups.. To that we'll be adding 410ml (1 3/4 U.S. cups) of water at the end.
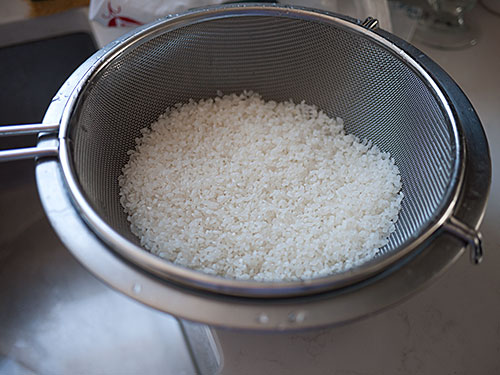
Equipment: We will be using a fine-mesh sieve and a bowl that the sieve can fit over, as described in the list of required ingredients and equipment for the course. This will yield about 660 grams, or a bit more than 4 U.S. cups of cooked rice, which will serve 3-4 people as part of a Japanese meal. To cook the rice we will be using a heavy-bottomed cast iron pot with a heavy lid as the base.
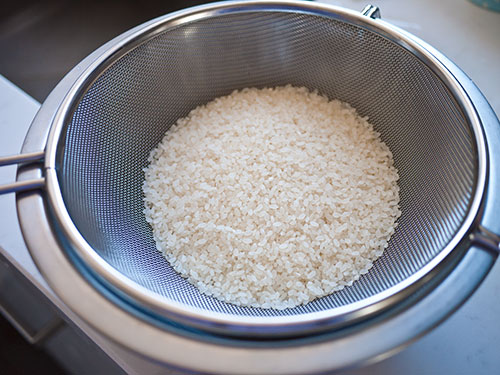
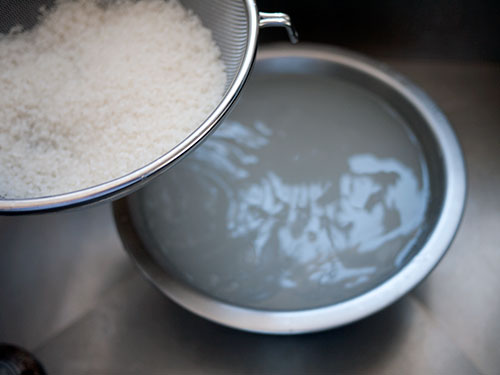
Measure the rice into the sieve, and put the sieve into the bowl. We'll be working in the sink.
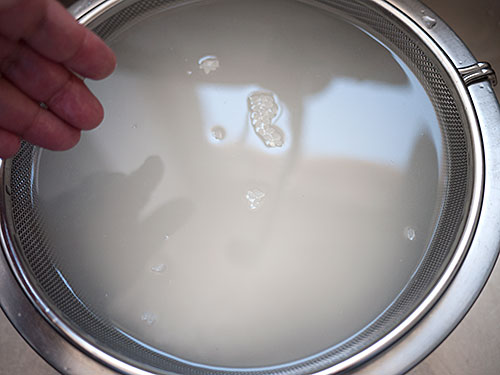
Run cold water from the tap at a fairly slow stream into the sieve/bowl. Rub the rice grains gently between your fingers. The water will turn very milky and opaque.
Lift the sieve out of the bowl. It's important to not let the rice sit in that milky water, otherwise it will be re-absorbed into the grains and the cooked rice will not taste as clean as we want it to be. Discard the water in the bowl.
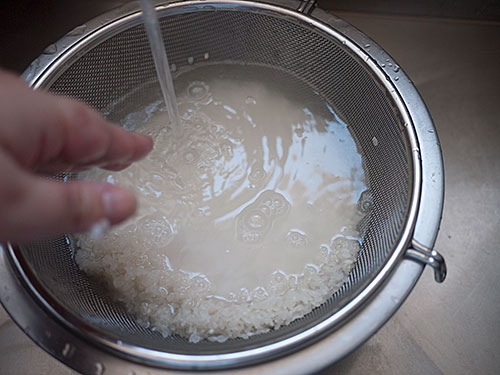
Repeat the fill with clean water -> rub grains gently -> drain away the cloudy water steps, until the water in the bowl is pretty clear. (Don't rub the grains together too hard or you may break them up, which is not the idea.)
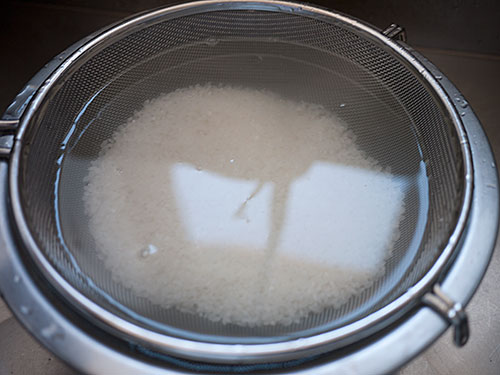
This about as clear as it should be. With most Japanese rice these days you only need to do the above 3 steps about 4-5 times, but if you're using another rice such as vialone, you may need a couple more rinse cycles as it were.
Drain the water away from the rice once again. Suspend the sieve over the bowl to let the rest of the water drain away from the rice, for at least 15 minutes. 30 minutes is ideal. (You use the bowl under the sieve to catch any dripping water, but if you have a sieve with legs you can just leave it in the sink.)
After draining for 30 minutes, the rice grains should look very white and a bit opaque.

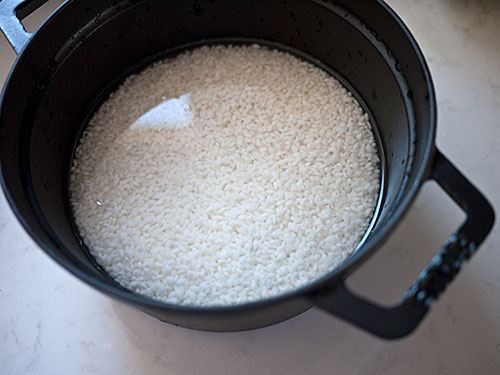
Put the rice and 410ml (1 3/4 U.S. cups) of water in the pot. This about 1.1 times the rice in volume. Note: If you have rice that's been around for more than a year, add a bit more water (around 420ml) to compensate for the rice drying out. Leave the rice to soak for at least 30 minutes, 1 hour is ideal. Soaking the rice ensures that the moisture penetrates each grain, so that they cook evenly and thoroughly in a relatively short time without getting mushy or leaving a hard uncooked center.
Some notes for the soaking step
- You can soak the rice for longer, up to a half-day or so. If you're cooking rice for dinner, you can rinse the rice in the morning and cook it when you get home (or set the timer on your cooker accordingly). If you are cooking rice for a bento you're going to be packing in the morning, rinse the rice and set it to soak at night. When the weather is very hot, it's safest to soak the rice in the refrigerator, but otherwise room temperature is fine.
- If you are in a big hurry you can skip or shorten the soaking time, but it will affect the texture of the rice. If you just don't have time to soak the rice, add a tiny bit more water.
- If you have a rice cooker, put the drained rice in the bowl and add water up to the 2-cup level. If you have a high-end rice cooker you just need to switch it on, since the cook cycles on these have the soaking time already built in. If you have a less expensive cooker that starts cooking the rice as soon as you switch it on, add some soaking time by setting a timer for 1 hour or more.)
- If you're lucky enough to have new-harvest rice, you can shorten the soaking time to 15 minutes.
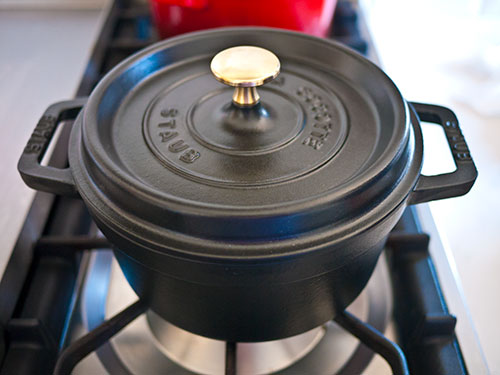
So we've soaked our rice. For this lesson we'll be using a small yet hefty cast-iron pot. You can use these instructions as-is if you are using a donabe (a pottery pot for cooking rice) or a tetsugama (an iron rice cooking pot). If you want to use a frying pan to cook the rice, please follow the instructions on this page. The most important thing that all methods share is a lid that sits quite securely on the cooking container. And of course, if you're using a rice cooker you can just set it and let it do its thing.
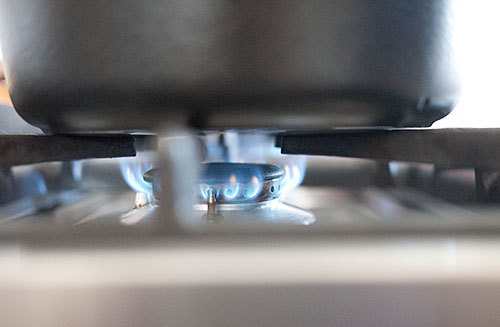
So we've now soaked our rice. Put the pot on the hob over medium heat on the low side. If you're using gas, the flame should be about this big in relation to the size of the pot. (For electric or IH, set the heat to a tick below medium.)
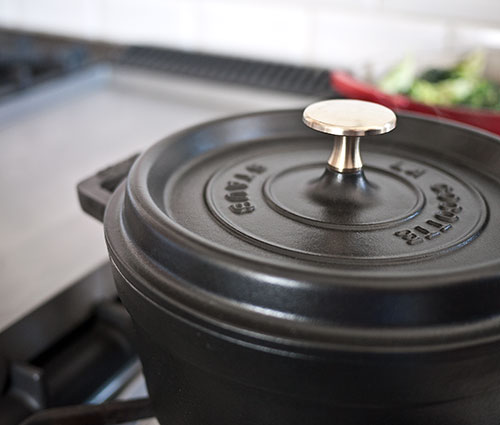
Now at this point, you can do as my mother advises: Set a kitchen timer for 12 minutes and forget about it until the timer goes off. This actually works pretty well. But if you want to fuss a bit over the pot and see how it progresses....
Let the pot heat. Do not open the lid. You should hear the pot start to boil. Eventually you should see steam coming out of the edges of the lid. (The photo doesn't show this too well to be honest, but in person you'll see it.)
Lower the heat a little bit more so it's a bit stronger than a bare simmer, and set the timer for 7 minutes. (Actually if you just let it be, the boil time + simmer time does add up to around 12-13 minutes. Mother knows best!)
At this point you really shouldn't open the lid but if you must, take a peak. You should see that the water is gone, the rice looks shiny, and there are little steam holes all over the surface. You may see a few bubbles.
Put the lid back on as quick as you can! Turn the heat off, and let it rest for 10 to 20 minutes.
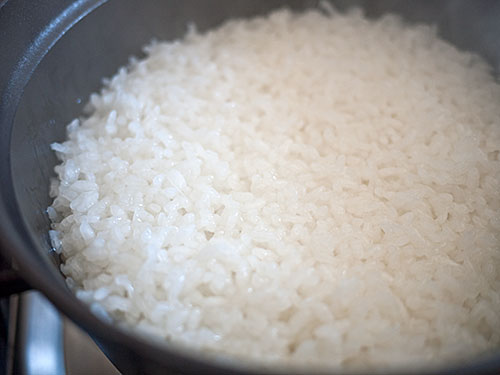
Open the lid - your rice should look like this: perfectly cooked, the surface dotted with little steam holes. There should be no excess moisture left in the pan, but if there is, put the lid back on and put the heat up to high for 20 seconds. Note that this may brown the bottom of the rice a bit.
Stir up your rice with a rice paddle. Use the paddle to turn up the rice away from the sides and the bottom. The stirring-up process helps any remaining excess moisture to evaporate, so the rice grains don't have a chance to get mushy. (Tip: this stirring-up is especially important if you are using a rice cooker and using the keep-warm function. If you don't stir up the rice the bottom parts get rather water logged.)
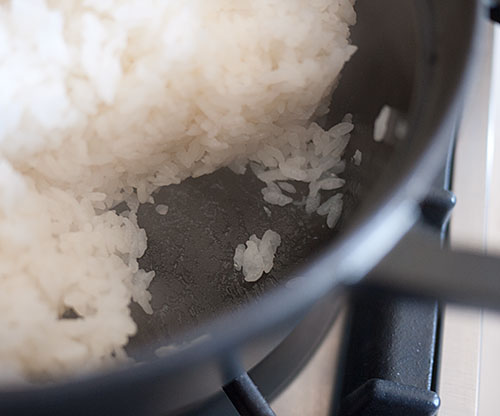
There shouldn't be any grains glued to the bottom or burned!
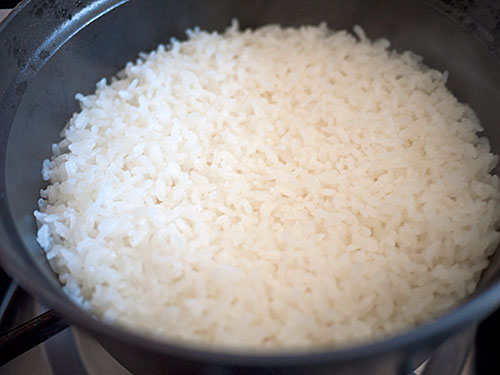
Take a small bit of the rice. Note the texture, the color, the flavor...it should be very much like that microwave-packet rice. Grains separate, sticking slightly together; sticking well together when pressed lightly; and a very clean flavor.
And there you have it - a perfectly cooked bowl of Japanese rice...
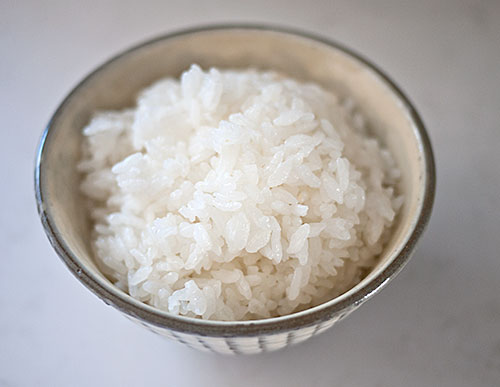
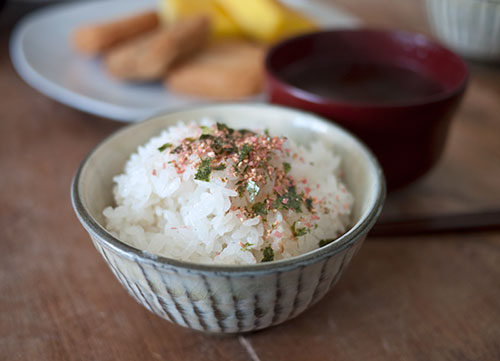
...the star of a Japanese meal (I put a little furikake on top.)
Phew, that was a lot of steps! But it's pretty easy once you have them down.
Summary: How to cook perfect Japanese rice
- Rinse the uncooked rice in several changes of clean water, while constantly draining the cloudy water away.
- Let the rice dry out a bit in a sieve.
- Put the rice and 1.1 times the rice in volume of clean water (c.g. 1 cup of rice = 1.1 cups water) in your cooking implement for at least 30 minutes, ideally 1 hour or more up to half a day.
- (Or follow the instructions for your rice cooker.
- If using a pot with lid: Lid on, heat pot over medium-low heat for 12 minutes (use a timer!) OR...heat over medium-low heat until steam is coming out from the edges of the lid; lower the heat a bit, and cook for 7 minutes (use a timer!)
- Turn off the heat, lid still on. Let rest for 10-20 minutes.
- Turn the rice up with a paddle.
- Enjoy!
I hope you can digest all that. I know it's a lot of instructions, but by following along you will have rice success.
Remember: whatever cooking method you use, including ones I haven't covered here such as using the microwave or the oven, the important parts of the process to ensure proper texture and taste are the rinsing an soaking steps.
Coming up, we'll have a bonus for Lesson 2: how to prepare sushi rice, or shari, plus how to take care of your rice cooker. Stay tuned!
And of course as usual, please post your comments, questions and results in the comment section right here or on the Facebook page.
Addendum: If you have very hard water
If you have very hard water in your area, you may find a kind of grey scum on the top of your cooked rice. You can just remove the scum and the rice should be ok, but if it bothers you try using filtered water for the soaking and cooking. When we lived in the Zürich area we used to filter our rice-cooking water with a Brita filter. In our new house, we invested in a water softener - one of our best decisions ever. The rice no longer looks grey, our towels aren't hard and spiky, and our shower drain doesn't need cleaning out nearly as much.
Filed under: basics rice washoku japanesecooking101Japanese Cooking 101, Lesson 2 Bonus: Sushi Rice (Shari) plus Smoked Salmon and Cucumber Chirashizushi
Now that you know how to cook Japanse rice properly, perfect sushi rice, called sushimeshi (すし飯) or shari (しゃり). Sushi rice is what makes sushi sushi - the topppings and things mixed in are almost secondary. So, for good sushi, you must have good sushi rice.
Dashi or no dashi?
Many books recommend cooking the rice with dashi, or something that has a lot of umami such as kombu seaweed. Indeed that's the recommendation I gave when first wrote about making sushi rice on this site almost 10 years ago. While that umami boost does make rice taste yummier, it's not always necessary if the things on top of the rice or mixed in the rice have plenty of umami anyway. Keep in mind that the soy sauce or other sauces have loads of umami too.
One trick of the trade that I learned from my mother, who used to run a very busy sushi restaurant, is: if you want the rice to have that extra bit of shine, add a tiny bit of flavorless vegetable oil such as canola oil to the rice when cooking - about 1/8 teaspoon per rice-cooker cup (180cc/ml). So per U.S. cup it's about 1/7th of of a teaspoon...a couple of drops really. Do not add any more - you don't want your rice to be oily, just shiny. This is a good trick to use if you find that the quality of the rice is a bit subpar.
For this lesson, we'll keep it simple and just cook plain rice, as detailed in the first past of this lesson. The only things we'll be adding are: rice vinegar, sugar, and salt - to the freshly cooked rice. I used some sucanat for this (which is a raw cane sugar that is light brown in color), and sea salt - just for that extra bit of luxury - but plain white granulated sugar and table salt will work just as well.
Sushi-zu (sushi vinegar) mix recipe:
For the amount of rice we cooked in the first part (360cc, or 2 rice-cooker cups, or 1 3/4 U.S. cups) we will need:
- 3 tablespoons rice vinegar (45cc) (1 1/2 tablespoons per cup)
- 1 tablespoon fine sugar (1/2 tablespoon per cup) (I used sucanat; white granulated or superfine sugar is fine)
- up to 1 teaspoon finely ground salt (1/2 teaspoon or less per cup) (I used sea salt)
Mix all the above together. That's it!
Note that the amount of salt depends on what you'll be putting on, or in, the rice. If you're making unseasoned raw fish sushi, then add 1 teaspoon; if you're making a sushi with salted ingredients, such as the smoked salmon and cucumber sushi below, you'll need less.
Sushi rice step by step
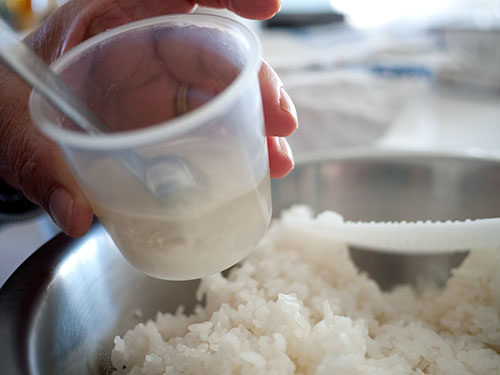
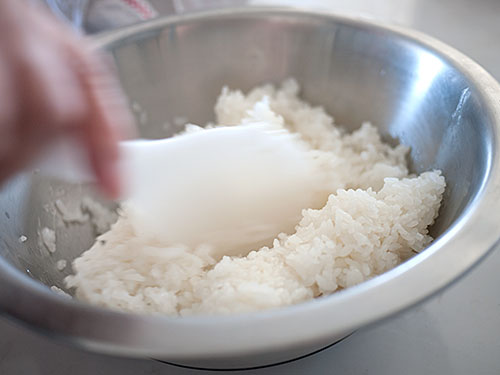
Here is another tip from my mother: as long as the rice is piping hot, there's no need to heat up the vinegar, sugar and salt so that the latter 2 ingredients dissolve. They will dissolve fine in that hot rice. Here she just quickly mixed them together in a rice cooker cup and dumped it on the rice. We used a stainless steel mixing bowl, because I don't have a nice wooden sushi oke or handai. (The wood helps to absorb excess moisture from the rice, but as long as you work rapidly a plain old bowl works well.) A tip here for rice cooker owners: don't mix the sushi rice in the cooker bowl, since the vinegar may damager the inner markings or coating, especially with less expensive cookers.
Rapidly mix the rice using a cutting motion with your rice paddle. It's rather like folding egg whites into a cake batter: use a cut-turn-fold motion, trying to break up lumps vertically and letting in air so that the rice cools rapidly. Don't squish the rice grains if you can help it.
If you have a pair of extra hands, they can help cool the rice more rapidly by fanning it from the side, but if not just mix the rice as quickly as you can. The metal bowl helps to cool the rice a bit faster than wood.
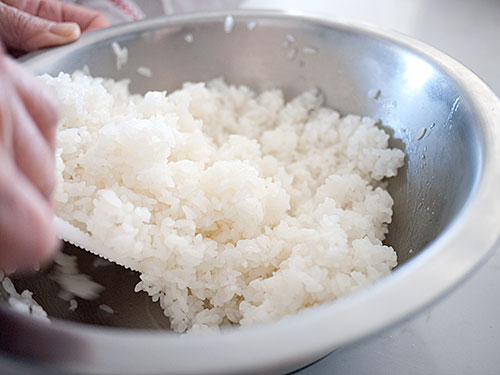
And so there you have it - a bowlful of sushi rice. It should still be slightly warm - the ideal temperature.
Recipe: Smoked salmon and cucumber chirashizushi
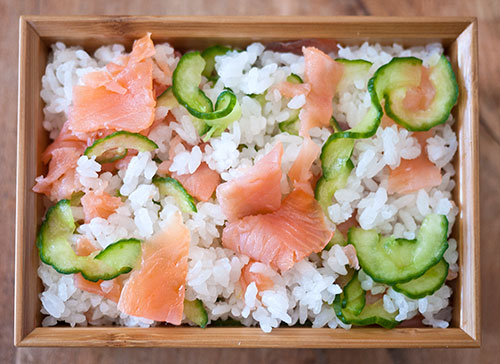
Chirashizushi (ちらし寿司) means 'scattered sushi', and is the easiest kind of sushi to make. This version uses two ingredients that anyone should be able to get - smoked salmon, and cucumber. Since the smoked salmon is 'cooked' so to speak, this sushi is great for bentos.
Ingredients:
- Cooked rice as per Lesson 2 (about 660g of rice - enough for 3-4 servings)
- 3 tablespoons (45cc) rice vinegar
- 1 tablespoon superfine or granulated sugar, or sucanat
- 1/2 teaspoon salt (less than the usual amount since the salmon and cucumber are salty)
- 1/2 English cucumber
- 150g / 5 1/4 oz smoked salmon
Cook the rice as per the instructions. While it's cooking, prepare the vinegar mix by combinting the vinegar, sugar and 1/2 teaspoon of salt. Set aside.
Slice the cucumber lengthwise and scoop out the seeds. Slice very thinly, and sprinkle with a little more salt (not listed). Massage the salt and the cucumber with your hands, and squeeze the cucumber tightly to remove excess water. Set aside.
Slice the smoked salmon into thin slivers. Set aside.
When the rice has finished cooking, while it's very hot empty it out into a bowl. Working rapidly, mix in the vinegar mix as per the detailed instructions above.
Once the rice is mixed, fold the cucumber and salmon in gently, leaving a few pieces to decorate the top.
Serve on a plate, in a bowl or in a bento box.
Filed under: japanese rice sushi japan washoku japanesecooking101