Japanese Cooking 101, Lesson 5 - Fish, Part 2: Fish buying tips, plus how to "open" a fish
Welcome back to Japanese Cooking 101: The Fundamentals of Washoku Lesson 5 - Fish! This is Part 2 of the Fish lesson; in Part 1 we started with an easy salmon teriyaki.
While many Japanese meat dishes are known around the world these days, such as tonkatsu and the gyuudon (beef on rice), many such meat dishes are in fact part of a different branch of cooking called yoshoku (yohshoku), or western-influenced Japanese cuisine. For a very long time eating meat was either actively discouraged or outright banned in Japan, so that most people who either lived near water or could afford it ate a lot of fish as their main source of protein.
So, learning how to deal with fish is quite important if you want to become a Japanese cooking whiz. Let's start at the fishmonger....
Where and how to buy fish
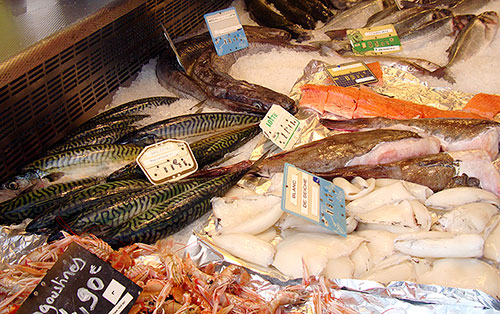
You will need to start by looking for a good fishmonger. If you're very lucky your local supermarket has a decent fish department (in the U.S. Whole Foods usually has a pretty good one), but otherwise you may have to ask around or do some research to find one that consistently stocks fresh fish.
A good fish seller should not smell 'fishy'. There will be some smell, but it should be like the ocean. If the place stinks, do not trust them.
A good fish seller should have a rapid turnover, and only stock what they normally sell. Just because there are tons of fish on display doesn't necessarily mean it's all good! Smaller fish shops may only sell locally caught fish. That's great, because it means that fish is fresh, in season, and all that you desire. If you live near the sea, you'll also want to see some locally caught fish, not just shipped in stuff. In addition, a good fishmonger will do things for you such as taking off the heads and removing the guts.
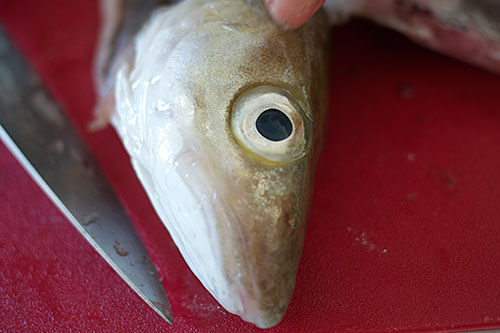
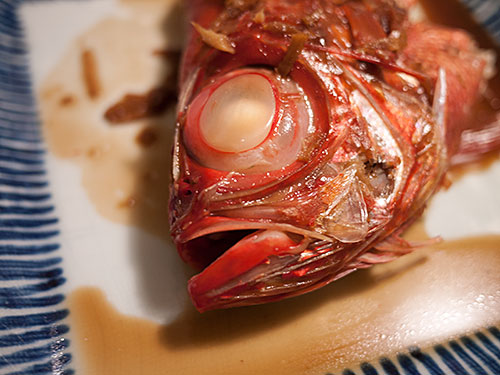
Look into his eyes...
Let's talk about fish heads for a moment. I know some people are squeamish about seeing eyes on the food they eat, but in the case of fish the eyes really say a lot. Fish generally start to go bad from the head down, and if the eyes look sunken or dull, that's bad news.
This is a nice, bright-eyed fish.
And how about this guy?
Anyway: when you are looking at fish, if they have their heads on, make sure they are as clear as glass. If the fish you want has already had its head removed, look at the fish that's on the shelf or in the case that do have heads - do they look nice and clear? If yes, your headless fish is probably good too.
Another way to gauge the freshness of fish, besides it smell (it should not smell 'fishy') and the eyes is if it's nice and firm and has a moist looking skin. You have to gauge this with your eyes only most of the time since fishmongers will not let you touch the merchandise. So, use what you can readily see and smell first.
How to 'open' a fish
There are several ways to cut a fish - fileting it for instance, or cutting it across the body into 'steaks', and so on. One way that's pretty common in Japan is to simply open it up, leaving the head on and the backbone in the fish. This method of cutting a fish is called 開き - hiraki (noun) or 開く - hiraku (verb, to open). It's like butterflying but a bit easier. It's also a good way to become familiar with handling a whole fish. If you fish, this is a great way to cook your catch on a campfire grill on the spot, since the opened up fish cooks quickly and evenly.
The easiest kind of fish to use for this - indeed the easiest kind of fish to cut up on your own, is a medium sized round-bodied fish like mackerel, herring, trout and so on. Flat fish like plaice or sole are not suited for this treatment. Here I have used a fish that looked nice at our local fish shop - I think it's called a smelt whiting or whiting in English; it looks a lot like a fish called kisu in Japanese.
If you can, get your fishmonger to take the guts out for you. It's less messy that way.
You will need a sharpt kitchen knife and a cutting board. If you chose a fish with proment plasticky scales, you'll also need a de-scaler. Tip: if you don't have a de-scaling tool, try a used by clean credit card-type card. Run it up the fish skin from the tail repeatedly until all the scales are loosened, and rinse off. In any case, always de-scale befor cutting up the fish.
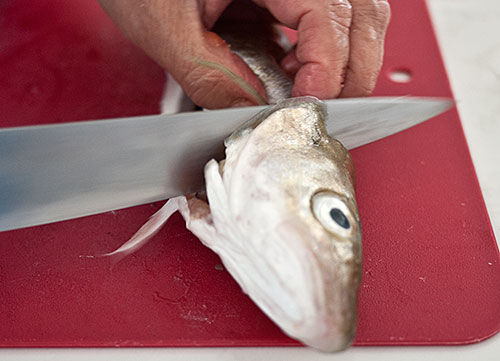
Put your knife in right behind the gills...
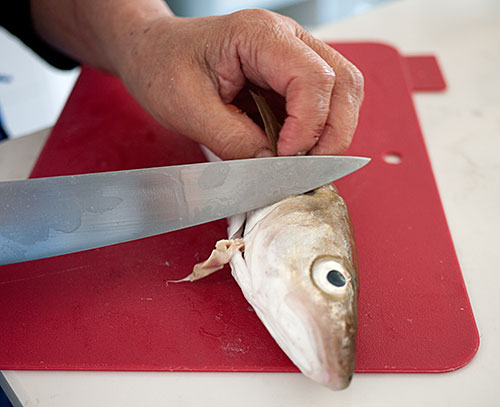
...and firmly cut through until you feel the bone. Don't go all the way through. (Tip: If you're removing the head, just keep going.)
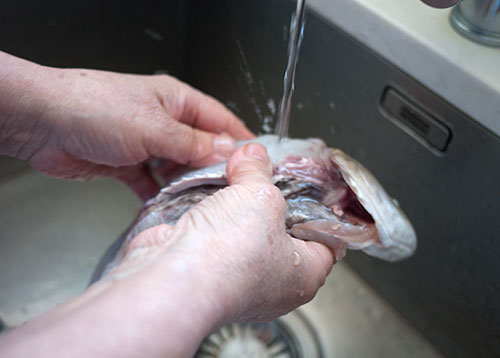
Start cutting the belly side of the fish, starting with where you made your head cut. If you didn't get the guts removed at the fish shop, this is the time to remove them. Pause to rinse out the guts and pat dry before proceeding.
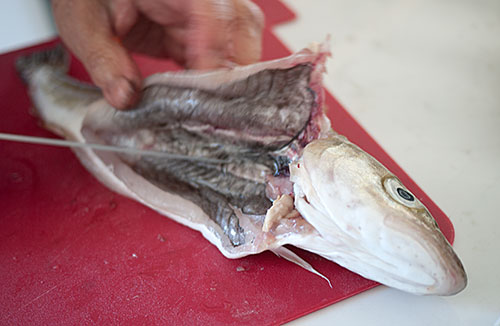
Cut through the belly side all the way to the tail....
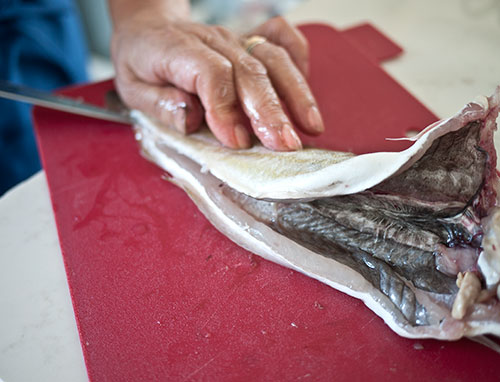
...then pull gently on the top half of the fish while slicing through right on top of where the bone is.
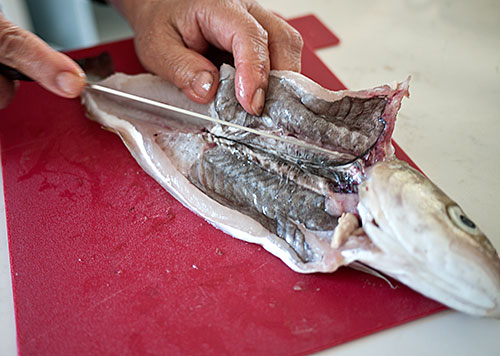
Once the top half of the fish is separated from the bottom half and only connected at the back side, wash the fish out thoroughly inside and out. Make sure that all the scales are rinsed away, as well as any residual bits of the innards. (Tip: If you are fileting the fish you'd keep going and cut all the way through the back part.)
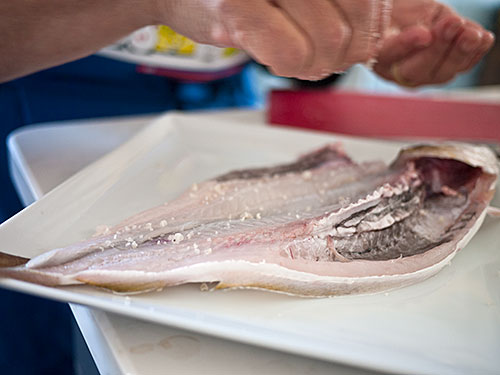
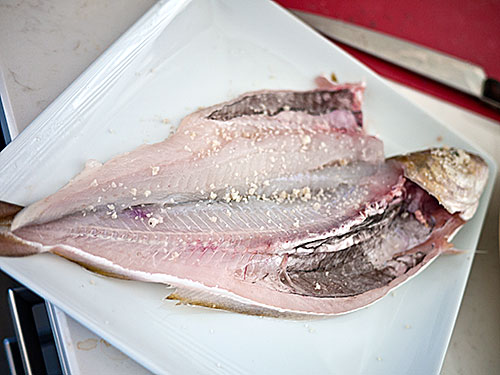
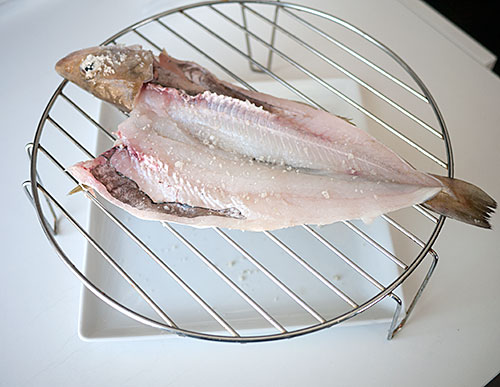
Pat the fish dry with paper towels. Isn't he a fine looking thing?

Put some salt in and round both of the eyes. This helps to keep them fresh a bit longer.
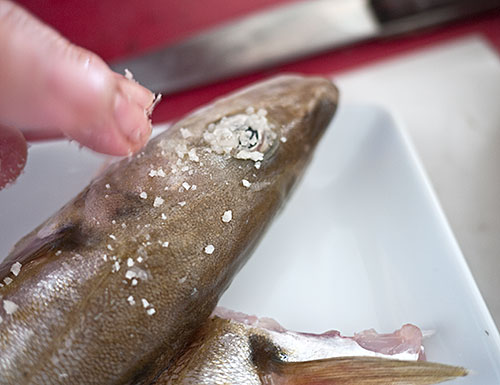
Lightly salt both sides of the fish. A good way to lightly salt something is to sprinkle on the salt from a high above; you get more even coverage that way.
At this point you can just grill the fish or pan-fry it, with no added seasoning if you want the flavor of the fish to shine through, or with a teriyaki sauce brushed on it (see Part 1 for the basic teriyaki formula.)
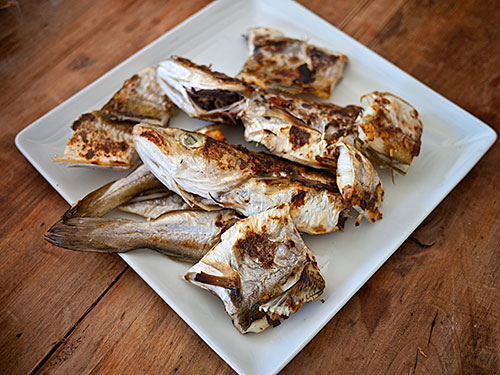
Or, you can make a sort of homemade himono or semi-dried fish, but leaving it on a rack for a day or two. (If you are not sure about leaving out fish in the open, and/or have some furry feline creatures around, do this drying bit in the refrigerator.)
Here is the fish after it's been air-drying for 2 days, simply grilled. It was delicious, in the way only really fresh fish can be. We had it with grated daikon radish and some soy sauce drizzled on top.
You can also pan-fry it in olive oil or butter, maybe with some herbs piled on for a great light meal.
Summary
- A good fish shop should smell fresh, and have a carefully selected array of fish, at least a good percentage of it of it locally caught if you live near the sea.
- A good fishmonger will know how to recommend fish to you and to do some basic processing such as gutting it.
- Look at the eyes of a fish! If they are nice and clear, the fish is fresh. Also trust your nose.
- Try cutting open a fish!
Not too complicated or scary, right? Next time we'll look at how to deal with tiny fish like sprats and sardines.
Filed under: fish how-to washoku knife skills